Materials:
Silver Nitrate (AgNO
3)
Sodium Thiosulfate or Sodium Thiosulfate Pentahydrate (Na
2S
2O
3 or Na
2S
2O
3-5H
2O)
Distilled water
Gloves
Mask
Containers
Spray bottle
Volume measuring device
Scale
We will be preparing 2 separate solutions that will be mixed later for spraying.
 Labeling your containers with A and B before will help to keep them from being confused.
 Wear the gloves throughout the preparation and application of STS, and wear the mask during the spray application of STS.
SOLUTION A – Silver Nitrate
1)
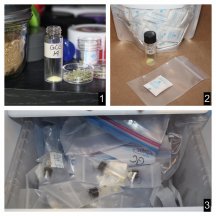
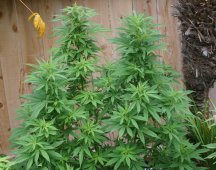
 Mass 1.7g of Silver Nitrate, and add this to your container labeled A (
pic 1,2)
 Be careful when handling the Silver Nitrate as it can stain your skin.
2)
 Add 100mL of distilled water to container A (
pic 3).
3) Agitate the mixture until the Silver Nitrate dissolves.
 Do not use metal objects to stir this solution (you can use plastic spoons, straws, or glass)
4)
 Store Solution A in a dark bottle or in a bag, and keep it in a dark place until needed for mixing STS spray solution (
pic 4).
SOLUTION B – Sodium Thiosulfate
‼
TAKE NOTE OF WHICH SODIUM THIOSULFATE COMPOUND YOU HAVE: EITHER SODIUM THIOSULFATE OR SODIUM THIOSULFATE PENTAHYDRATE! The only difference between the two is that one has water in the compound that can throw off the concentrations of our target solution if no tweak to the mass is made.
5) Mass either:
6.32g Sodium Thiosulfate OR 9.92g Sodium Thiosulfate Pentahydrate and add this to your container labeled B (pic 5,6).
6) Add 400mL of distilled water to container B (pic 7).
7) Agitate the mixture until the Sodium Thiosulfate dissolves.
 This mixture does not need to be protected from light (pic 8). Both mixtures can be stored for long periods of time and mixed when needed for reversal.
Preparation of STS
We will be mixing an amount of
Solution A and
Solution B to create the Silver Thiosulfate. It is very important to note:
‼
WE MUST ADD SOLUTION-A TO SOLUTION-B WHEN MIXING.
To create a stock solution of STS, we will need a ratio of [
1partA :
4partsB]. You can tailor your volume to make only what you will need for your spraying application.
For the purposes of this example, I will prepare a stock solution of specific volume:
8) Add 5mL of Solution A to 20mL of Solution B. You now have a stock solution of Silver Thiosulfate (STS) (
pic 9).
 The STS solution is not very stable, so it is best to only prepare what you will be using for one round of spraying.
Dilution of STS for Spray Application
Depending on the particular plant you would like to reverse, you may need stronger/weaker STS spray. You can use 1:2, 1:3, 1:4, etc. ratios of STS:Water.
I will be using a 1:2 ratio and make any adjustments based on how the plant is responding.
9) Since we have 25mL of STS prepared, we can add 50mL of distilled water (
pic 10). We now have 1:2 STS reversal spray solution. Add this mixture to your spray bottle if you mixed in a different container (
pic 11).
Application of STS
 You could spray a target female while in the growing space around other plants (assuming you get no spray on any other plants) with success, but we will remove the target female and segregate her for spraying.
10)
 Place a drop cloth, cardboard, or cover under the female to keep overspray contained. This also has the effect of shielding the soil from STS overspray (
pic 12).
11) Spray the female liberally, either as with any foliar spray application or targeting only nodes. I have chosen to spray the entire plant (
pic 13,14).
12) Allow the female to dry before returning her to the growing space.
You will repeat the STS spray application every 7-10 days until you observe the development of male parts. This means there will only need to be 2-3 applications of the STS spray for successful reversal and collection of pollen.
 The female will take about 2 weeks to show the fruits of reversal. Some suggest to begin the spraying 2 weeks in advance of flower to keep her closer to a schedule seen with males. For this plant, I will be spraying at the start of flip.
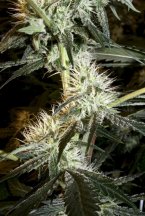
Here is the Chemdog’91(skva) progressing through the reversal process, culminating in harvestable pollen around day 29.
REVERSED POLLEN COLLECTION
There are many ways to go about harvest and collection of fem pollen, but this is how I go about the process.
Materials:
Reversed pollen sacs
Grinder screen and lid (
no kief catch)
Scraper (
cut from plant tag)
Pollen container
Razor
Work Surface (
black paper plate)
1) You can better prep your pollen by separating the “bananas” from any other plant matter, but I left them on in this picture (
pic 1).
 Allowing your freshly plucked pollen sacs a day to dry before attempting this will aid in pollen collection.
2)
 Place the bananas in the grinder screen (
no kief catch attached to bottom), and gently agitate/chop with the scraper (
pic 2).
3) Holding the screen with one hand, gently tap the side with the grinder lid. You will see the bananas skid across the screen (
pic 3).
4) Give the screen a minute before gently lifting to reveal the separated pollen (
pic 4).
5) Scrape the pollen with your razor and store into your pollen container.
With your fem pollen created and collected, you can now pollinate your females to create feminized seeds. Feel free to marry this with the single branch pollination process to create small batch fem seeds for yourself without sacrificing whole plants.

