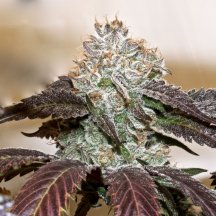
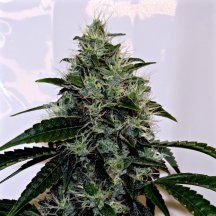
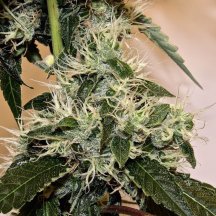
Day 45 of flower


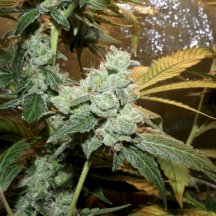
They all look great ,,I’m really liking that Chocolate DieselDay 45 of flower
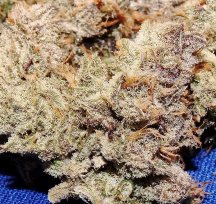
Thank you, Useful Seeds offers Chocolate Diesel S1 beans.They all look great ,,I’m really liking that Chocolate Diesel

Thank you. I think I’ll have to pick some upThank you, Useful Seeds offers Chocolate Diesel S1 beans.
You're welcome.Thank you. I think I’ll have to pick some up
This is such a great write up. Thank you for sharing thisI would like to share my method of pollen collecting and targeted single branch pollination. If you decide to replicate this process for yourself, please be warned that having a male dropping pollen requires great care. I have organized this information into 3 sections: Flowering the Male, Collecting/Storing Pollen, and Pollinating a Single Branch.
FLOWERING THE MALE
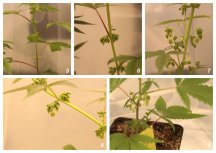
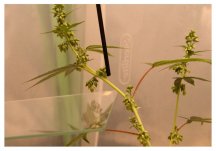
I usually take clones of males to keep their size manageable. Once they are rooted, I plant them in a 3” square pot and put them in a clear storage tote (pic 1). You will want to keep the tote lid slightly ajar to allow for air exchange.
Where to keep him depends on whether you have a free tent, separate veg space, or just another room with sunlight. For times when all tents are taken, I keep the male in my veg area (pic 2). It is important to remember that he will be separated from the flowering females.
⚠ In the corner of your veg room or peripheral splash over light is just fine to trigger the male. There’s no need to put him 3” beneath a 1000W DE, I’ve flowered males from the spillover light of a T5.
If you have a single tent with females flowering, the ambient light in another room is enough to accomplish our task.
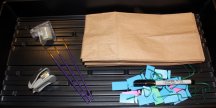
The 12hr dark cycle is achieved by placing a box over the male’s clear tote (pic 3). This 12/12 box covering will trigger and maintain flowering through the entire process until you’ve collected enough pollen.
⚠ Make sure the box is large enough to cover your storage tote before you begin.
If you are triggering a male for a one-time pollination without storing pollen, then timing will be important. Males will usually develop flowers pretty quickly relative to their female flower setting counterparts. Since we want our females to have a decent flowerset to accept pollen, we have to give her some time to develop them. With most strains, weeks 3-4 will give us the best window to have both nice flower setting and early enough to give the seeds time to mature.
⚠ Don’t trigger your male until about day 10 of flower for your females. This gives females the head start to ensure there will be nice sized buds to give you seeds, as well as not have to deal with and worry about a male dumping tons of pollen too early.
This 12/12 box cycle will continue for the duration of pollen collection.
⚠ You want to approach most things in this process slowly and carefully. There is no extra credit for speed. Being gentle and deliberate with him will ensure any pollen stays within the tote. Pretend you’re doing tai chi at the senior center when you interact with him.
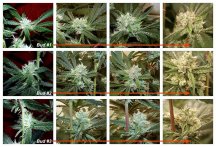
As you gain confidence and success with this process, you can flower multiple males simultaneously (pic 4).
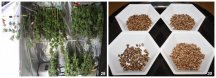
Keep in mind, the goal here is to be aware of his maturity in order to collect pollen long before he creates dust storms. At first, his flowers will be small balls (pic 5) that are not much of a threat to your females at this point. As they begin to develop, you will notice that they cluster and start to hang (pic 6). Usually this timeline window can be from 10-20 days. As the male flowers begin to individualize from the clusters you are now on pollen watch.
⚠ This is the point at which you will need to be very careful about moving him around and watering him.
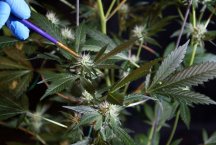
Once you begin to see the male flowers open, the yellowish anthers will be visible (pic 7) but not drop pollen just yet. The pollen is only hours away at this point, so remain vigilant. If you try to collect pollen as soon as the male flower opens, you’ll find no pollen freely drops, so wait until you see the anthers go from a tight smooth sheen, to bloated matte yellow (pic 8 ).
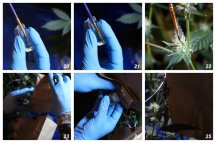
If you find that you are having issue timing the pollen drop, you can wait until one of the flowers releases pollen onto a leaf below (pic 9).
The male flowers will reach maturity at different rates, which we can use to our advantage. The older male flowers will be first to drop and keep in mind we are only needing a few flowers worth of pollen in order to pollinate multiple single branches. By collecting the first few pollen drops, we are containing the threat of stray pollen.


Thanks, it's my pleasureThis is such a great write up. Thank you for sharing this

Thank you so much, I really appreciate that. My hope was to have a solid guide with visuals that adds the little tidbits that are usually learned through failure to save everyone the hassle. If you decide to give it a shot and have any questions, I'm glad to help.I have read info on this stuff alot. And this is by far the best, you just have a way of putting it all together so well. Great descriptions of the process and great pics to go along with them. You make it seem so easy.

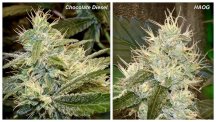
I grew out Useful's Chocolate Trip F4 and found a very frosty lady that is waiting for some future projects.Thanks Ive only done one intentional pollination think it was 2 years ago now Feb of 17 with the chocolate trip f2 from bodhi. I took the male on the left and hit my female trips for f3s I think it was about the same time Useful did his. I still have a nice amount of those in my seed stash. Just two days ago I got rid of a male of White shark X Aloha White Widow f2 now im kinda regretting it. lol

The biggest difference I experience is in the taste. The usual refrain is that hydro wins with yield, but soil wins with taste. I find that many soil grown flowers all have a similar "earthiness" to their taste, almost like you can taste the soil.Schwaggy, on your soil vs hydro side by sides. I see there are discernible growth differences between the two.It seems to more bud growth on the hydro side(expected). Outside of the visual differences,are there any differences in the final product?
Excellent response.I share the same view in this regards.Eh,I wouldn't have put it so eloquently tho.The biggest difference I experience is in the taste. The usual refrain is that hydro wins with yield, but soil wins with taste. I find that many soil grown flowers all have a similar "earthiness" to their taste, almost like you can taste the soil.
If you were to have a earthy, kushy strain which draws from this section of the flavor palette, then the boosted nuances in this earthiness/soil can be interpreted as a great, "better" product when compared to the hydro product. If you are cultivating a more fruity/sweet strain that shines with a "cleaner" taste, then you might find the hydro grown to better showcase this as the boosted earthiness is mostly absent.
I have had a few cuts that express a heavy earthy/soil flavor in the hydro flowers. To me, this gives me a more clear picture as to the genetic flavor contribution since I can be assured that this experience is not a result of the growing medium.
There are some hydro friendly hybrid organic/synthetic additives that can mimic the soil taste, so you could impart that in hydro flowers if you were so inclined. Ultimately, there isn't a wild night/day difference in great runs of the same cut, but since this is such a subjective topic, I'm sure many will have differing opinions.