Magrowers
Active Member
First - If someone happens to see this while I am posting...let me finish. I am going to be posting for awhile so lay off for an hour or so. I will let you know when you are good to go.
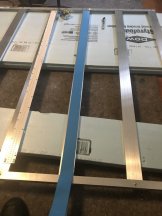
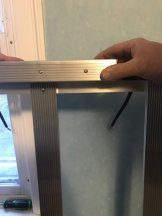
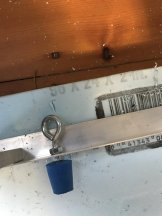
This is based on a 5x5 tent. The actual leds are about 44” so if you shrink the frame and heat sink length you probably could squeeze it in. Alternatively you can replace each 4’ with 2 2’ strips. This is a minimalist setup, but if you do things right it will be an extremely solid setup.
Tools
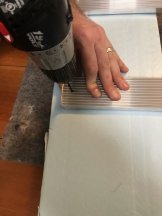
-Drill
-11/64th drill bit (size for #8 bolts)
-Screwdriver
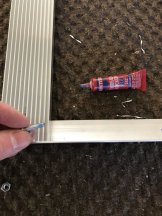
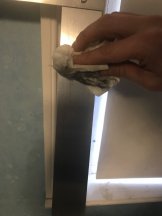
-Rubbing alcohol (to clean heat sinks before applying thermal tape)
-Adjustable wrench (to hold #8 nuts)
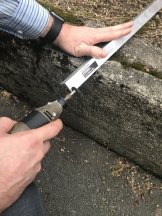
-Wire stripper or be very very good/careful with a razor blade, seriously get/borrow some strippers
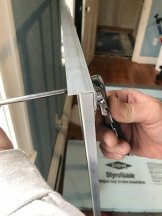
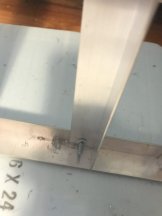
-dremel tool to shave down 1 aluminum angle so it will fit between 2 heatsinks-not necessary if you can figure out an alternate method of mounting heat sinks
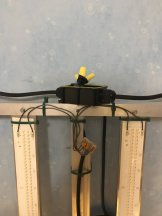
-Zip ties - a bunch for keeping wires to frame
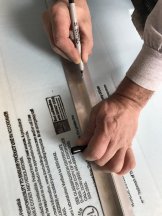
-Fave color sharpie...get a nice thin or new one...not a old shitty used one
-if available a heat measuring gun or if you are extremely lucky a thermal camera
Parts
Digikey.com
SI-B8VZ91B20WW 4’ Samsung 3000k 561c leds (I got 6..vary for your size area)
Digikey
1 CORD 18AWG NEMA 5-15P TO CBL 15 (15’ cord, you can buy shorter or longer depending on needs)
Arrow.com
3 HLG-240H-48A drivers 1 driver powers 2 strips. You can use a bunch of different drivers. Do your research. This was the cheapest option that I found. (They sell 480-48’s which will power 4 strips)
Heatsink USA
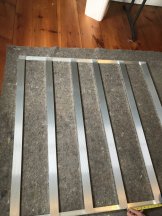
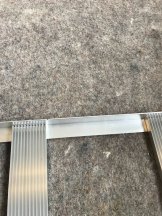
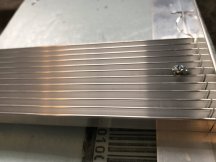
6 pieces of 2.079" Wide Extruded Aluminum Heatsink 48” long (one for each strip)
Home Depot
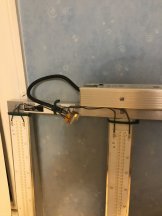
3 Aluminum angle 1x 1/16 x 48 - you can go 1/8th if you want more thickness, I don’t think it’s needed. Thicker will help prevent twist.
Amazon or eBay.
Double sided thermal conductive tape 45mm width, length depends on how many strips...most rolls are 25 meters long which is plenty. Alternately you can buy thinner width and double up.
Amazon, Lowe’s, Home Depot
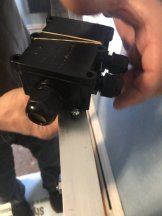
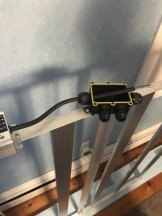
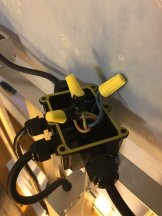
4 way outdoor junction box ( or any junction box) I got an all plastic one from China that took a month to get here. But it was worth it.
Amazon
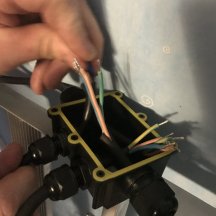
25’ or so of 18 gauge wire (solid copper or tin plated copper)
Homedepot
Machine screw pack #8-32 x 3/4 in round combo w nuts (75 pack is cheap)
4 Eye bolts (go to homedepot and look at their selection...get ones that will fit your ratchet ropes and make sure you have a drill bit that will work to make the holes for it)
4 extra bolts for your eye bolts
Loctite (blue)
Amazon
About 15 Wago connectors lever nuts 4 connectors (most of the time you only use 3 spots..if you want to use reg wire nuts for power cord to 3 ballasts you can just use the 3 slot connectors. Buy the 25 pack, they are useful. In this build I use 3 slot wagos and wire nuts.
4 rope ratchets to hang in tent
Optional recommended - Self tapping screws #8x1/2 (3 or so per strip..bulk are cheap) used to attach strips to heatsinks in addition to tape
Optional recommended - rubber stoppers to cover screw ends of eye bolts/act as feet
This is based on a 5x5 tent. The actual leds are about 44” so if you shrink the frame and heat sink length you probably could squeeze it in. Alternatively you can replace each 4’ with 2 2’ strips. This is a minimalist setup, but if you do things right it will be an extremely solid setup.
Tools
-Drill
-11/64th drill bit (size for #8 bolts)
-Screwdriver
-Rubbing alcohol (to clean heat sinks before applying thermal tape)
-Adjustable wrench (to hold #8 nuts)
-Wire stripper or be very very good/careful with a razor blade, seriously get/borrow some strippers
-dremel tool to shave down 1 aluminum angle so it will fit between 2 heatsinks-not necessary if you can figure out an alternate method of mounting heat sinks
-Zip ties - a bunch for keeping wires to frame
-Fave color sharpie...get a nice thin or new one...not a old shitty used one
-if available a heat measuring gun or if you are extremely lucky a thermal camera
Parts
Digikey.com
SI-B8VZ91B20WW 4’ Samsung 3000k 561c leds (I got 6..vary for your size area)
Digikey
1 CORD 18AWG NEMA 5-15P TO CBL 15 (15’ cord, you can buy shorter or longer depending on needs)
Arrow.com
3 HLG-240H-48A drivers 1 driver powers 2 strips. You can use a bunch of different drivers. Do your research. This was the cheapest option that I found. (They sell 480-48’s which will power 4 strips)
Heatsink USA
6 pieces of 2.079" Wide Extruded Aluminum Heatsink 48” long (one for each strip)
Home Depot
3 Aluminum angle 1x 1/16 x 48 - you can go 1/8th if you want more thickness, I don’t think it’s needed. Thicker will help prevent twist.
Amazon or eBay.
Double sided thermal conductive tape 45mm width, length depends on how many strips...most rolls are 25 meters long which is plenty. Alternately you can buy thinner width and double up.
Amazon, Lowe’s, Home Depot
4 way outdoor junction box ( or any junction box) I got an all plastic one from China that took a month to get here. But it was worth it.
Amazon
25’ or so of 18 gauge wire (solid copper or tin plated copper)
Homedepot
Machine screw pack #8-32 x 3/4 in round combo w nuts (75 pack is cheap)
4 Eye bolts (go to homedepot and look at their selection...get ones that will fit your ratchet ropes and make sure you have a drill bit that will work to make the holes for it)
4 extra bolts for your eye bolts
Loctite (blue)
Amazon
About 15 Wago connectors lever nuts 4 connectors (most of the time you only use 3 spots..if you want to use reg wire nuts for power cord to 3 ballasts you can just use the 3 slot connectors. Buy the 25 pack, they are useful. In this build I use 3 slot wagos and wire nuts.
4 rope ratchets to hang in tent
Optional recommended - Self tapping screws #8x1/2 (3 or so per strip..bulk are cheap) used to attach strips to heatsinks in addition to tape
Optional recommended - rubber stoppers to cover screw ends of eye bolts/act as feet